Fitting and Tying a Rope Halter
Rope halters are wonderful training and handling tools; I use them with 12 foot lead ropes on all my horses. You can buy them online, in catalogs, or in many tack and feed stores, but bear in mind that there are many different brands and designs and they are not all created equal by any means. Generally speaking, the thicker the rope the less pressure it will exert. Some folks prefer halters made of narrow cord, but I strongly favor a medium-weight, fairly stiff rope that wears well, such as that used in the Double Diamond brand halters shown in the pictures below. Some halters on the market are made of such lightweight and soft rope that knots tied in them are not secure, and though they come in lovely colors they just don’t do the job. Spend the money for a good rope halter and you won’t be sorry.
Keep in mind that rope halters are for handling and training only; never turn a horse out into a pasture or paddock, nor lock it in a stall, in a rope halter. For turn-out, stalling, and other unsupervised situations it is important that an accidentally snagged halter can break before the horse wearing it does, and rope halters are too strong to insure this; instead, use a leather or nylon web halter with a break-away crown piece. You can use a rope halter for trailering, as I do, but only in combination with a pull-away clip (as discussed in my article, Safety First).
Fit it right
I've noticed that a surprising number of folks fail to properly fit a rope halter to the horse's head, greatly reducing its effectiveness. A properly fitted halter will sit high on the horse's nose, with the jaw pieces passing behind the horse’s jaw, not across the cheeks (see photos 1 and 2, below). With the jaw pieces in the proper position, when you pick up on the lead rope to ask your horse to move toward you, the pull will be applied not just on the poll (where the neck meets the head, just behind the ears) but from behind the jaw as well, giving you much more control. Additionally, when properly fitted the two knots in the nose piece are resting on bone, optimally positioned to apply a little persuasive pressure when needed.
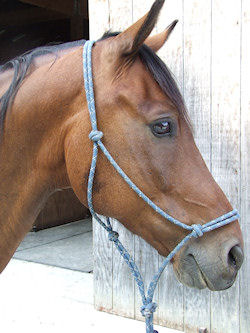
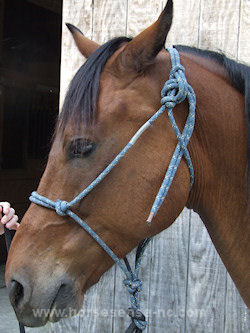
Figure 2 (right). Right fit: The nosepiece sits high on the nose, and jaw pieces run behind the jaws.
Tie it right
Many folks tie a halter incorrectly, passing the free end of the crown piece through the halter's loop eye, then tying off the crown piece to itself above the loop eye in a granny knot. This makes for a bulky and insecure knot which can be difficult to untie. Figures 3 through 5, below, show you step-by-step how to tie a proper halter knot, like that illustrated in Figure 2. It's easy!
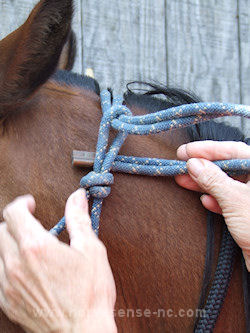
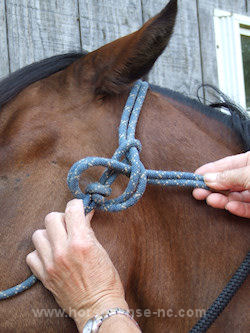
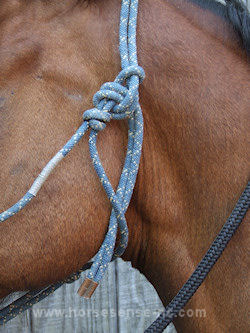
Figure 4 (top right). Next, bring the free end of the crown piece back over the loop eye, then through the loop the crown piece has formed.
Figure 5 (left). Finally, pull the knot snug and tuck the free end beneath the jaw piece so that it is out of the way and won’t flap.